Linocut vs Woodblock: Navigating Grain and Resistance in Relief Printmaking
Rethinking Relief Printmaking Beyond Novice and Master Labels
Relief printmaking is often introduced through a familiar hierarchy: linoleum is presented as the approachable beginner”s surface, while wood is reserved for artists presumed to have mastered more demanding techniques. That division is convenient, but it is technically misleading. Neither material represents a fixed level of artistic seriousness. Each offers a distinct physical conversation between hand, tool, substrate, ink, and paper. A practiced printmaker may choose linoleum for its uninterrupted curves and dense, even flats, or select wood precisely because its grain introduces resistance, variation, and visual evidence of the block”s natural structure.
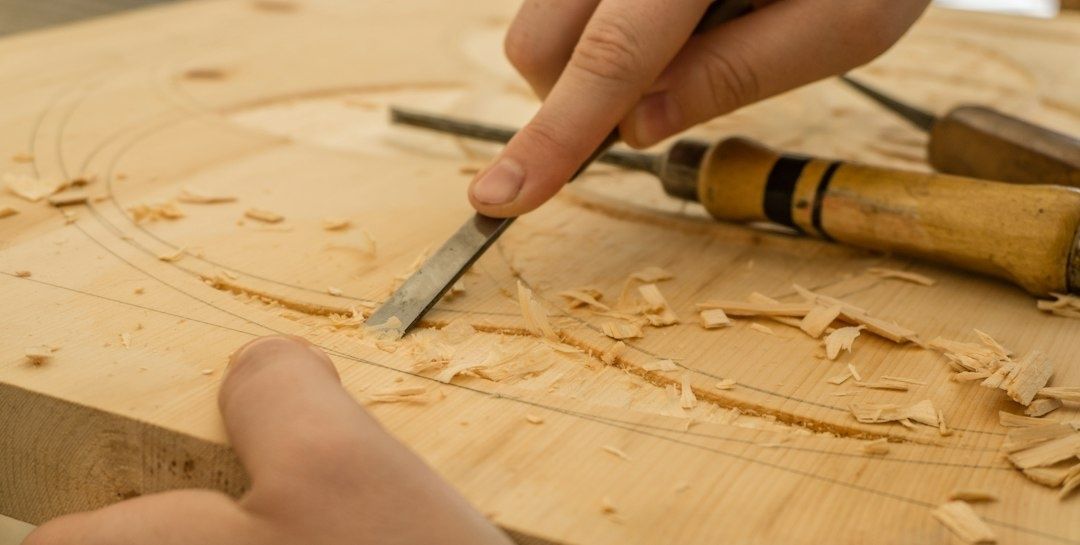
The central question is therefore not which material is more advanced, but what kind of mark the material makes possible. A gouge does not encounter an abstract “block.” It encounters a surface with a particular density, elasticity, cellular arrangement, and direction of resistance. The tool may glide, compress, buckle, split, or stop depending on those conditions. Understanding the deep history of printmaking techniques helps place these decisions in context, showing how changes in material and process have continually shaped the visual language of relief art.
For studio learners, educators, and artists working in community print rooms, this material awareness can transform practice. It encourages safer tool handling, more economical preparation, and a clearer relationship between intended image and chosen surface. The following comparison treats linoleum and wood not as rungs on a ladder, but as responsive partners whose resistance can be deliberately used to develop line, texture, rhythm, and expressive force.
Substrate Density and the Physics of Cellular Fiber
Linoleum and wood differ first at the level of structure. Traditional linoleum is a manufactured compound made primarily from cured linseed oil, commonly combined with cork dust and wood flour, supported by a jute canvas backing. Its surface is comparatively uniform and lacks the directional grain found in timber. This does not mean that every sheet behaves identically. Temperature, age, thickness, backing, and manufacturing quality affect flexibility and cutting response. Nevertheless, the material generally offers a more consistent resistance in multiple directions, allowing a line to continue across the block without negotiating annual growth rings.
Wood is anisotropic, meaning that its mechanical behavior changes according to direction. The fibers run primarily along the tree”s growth axis, while growth rings, rays, knots, and changes in density create additional variations. A tool pushed parallel to the grain may travel smoothly, whereas the same tool turned across it may compress fibers, lift splinters, or abruptly change direction. Basswood and lime are valued for relatively forgiving side-grain carving, while cherry can provide a firmer, more defined surface. Shina plywood offers a stable, layered alternative, although its veneers and adhesive structure still require attention to cutting direction.
| Feature | Linoleum | Side-grain wood |
|---|---|---|
| Directional resistance | Relatively uniform in all directions | Strongly affected by grain direction |
| Line behavior | Smooth curves and consistent channels | Variable lines with possible compression or tear-out |
| Surface character | Dense, quiet, and often velvety | Porous, textured, and responsive to natural variation |
| Printing considerations | Often supports crisp hand-burnished impressions | May require greater pressure, sealing, or dampened paper |
That contrast directly affects visual syntax. A sweeping contour in linoleum can retain an even width and clean curvature, making the material useful for graphic silhouettes, lettering, and broad areas of saturated color. Wood introduces the possibility that the same contour will acquire a slight angularity or broken edge as it crosses changing fibers. Such interruptions are not necessarily defects. They can become part of the image”s regional character, much like visible brushwork in a painting or the irregular edge of a hand-torn paper.
End Grain Versus Side Grain in the Relief Studio
Most familiar woodcuts use side-grain boards or plywood, where the carving tool meets the long direction of the fibers across the block”s face. The result depends heavily on the chosen species and the orientation of each cut. Basswood and lime are often comfortable starting points because they permit controlled removal without the extreme hardness associated with engraving blocks. Cherry is denser and can support sharper detail, but it asks for more deliberate pressure and better edge control. Shina plywood is widely used for its comparatively consistent surface and manageable weight, although a maker should still test a small area before committing to a complex design.
End-grain wood engraving presents a different mechanical environment. A boxwood block is cut across the ends of the fibers, producing a dense surface that can support exceptionally fine lines and compact detail without the same tendency toward long lateral splintering. The sensation can resemble engraving in metal, not because the materials are identical, but because the tool is supported by a more compact field of fibers. End grain is demanding in terms of block preparation, tool sharpness, and physical effort, and it is not simply a more prestigious version of a side-grain woodcut.
Unbacked linoleum occupies another position. It has no natural grain to redirect an organic contour, so a curved line can be developed through a continuous push or pull with fewer interruptions. This freedom was central to the medium”s appeal as linocut moved from industrial floor covering into graphic art, a history outlined in Britannica”s account of linocut. In a shared studio, however, even forgiving materials require attention. A block that shifts on a smooth table can turn a controlled cut into a dangerous slip, while an unexpected grain change in wood may send a gouge toward an adjacent shape.
- Rotate the block rather than forcing the wrist to maintain an awkward angle.
- Always cut away from the body and keep the holding hand safely behind the blade’s cutting path, using a bench hook or non-slip mat to stabilize the work.
- Make test cuts along several grain directions before transferring a detailed design.
- Reserve flexible, sweeping contours for orientations that offer the cleanest resistance.
- Accept small grain interruptions as potential texture, but remove unstable splinters before printing.
Tool Bevel Preservation and Blade Dynamics
Substrate hardness places direct demands on tool steel. A sharp blade does not remain sharp because of its label or price. Its edge is altered by compression, abrasion, impact, and the angle at which it enters the material. Soft or flexible linoleum usually permits an acute cutting profile, allowing a V-gouge or knife to enter cleanly and produce a fine line. Dense wood requires more support behind the edge. A slightly steeper bevel can reduce the likelihood of edge collapse or micro-chipping, particularly when the tool encounters knots, hard latewood, or a cut made against the grain.
Japanese laminated tools demonstrate one effective approach to this balance. Traditional construction pairs hard, high-carbon steel, which holds a keen edge, with softer steel that supports it and reduces brittleness. Chokokuto lines such as Futatsu Wari Moku Hanga To and Josei Moku Hanga To are known for careful forging and sharpening, while less expensive tools made through automated joining may require more frequent maintenance. Western U-gouges and V-gouges remain highly practical, especially when chosen for comfortable handles and appropriate blade geometry. The essential principle is fit: a tool should match both the substrate and the artist”s hand.
Maintenance becomes more important during a long edition. A dull blade encourages increased pressure, which reduces control and raises the chance of a slip. A practical routine includes inspecting the cutting edge under strong light, stropping regularly to remove a fine wire edge, and returning to water stones when stropping no longer restores clean cutting. Japanese tools are commonly finished on water stones, while many Western tools have their own recommended sharpening angles. Mallets should be used only with tools designed to receive that impact, especially those equipped with suitable ferrules. Tools intended for wood or linoleum should not be treated as universal instruments for hard surfaces.
- Use a narrow V-gouge or knife for precise outlines and a broader U-gouge for clearing larger areas.
- Test the edge on scrap from the same block, since hardness can vary within one piece of wood.
- Strop before the edge begins to drag, rather than waiting until the tool visibly tears the surface.
- Sharpen slowly and preserve the original bevel instead of repeatedly creating a new angle.
- Keep separate expectations for side-grain carving and end-grain engraving, where specialized tools may be appropriate.
Ergonomics and Wrist Biomechanics Under Continuous Pressure
Relief carving is a full-body activity, even when the visible mark is only a few centimeters long. Efficient cutting begins with a stable kinetic chain that can involve the shoulder, upper arm, forearm, hand, and fingers. In softer linoleum, a maker may rely more heavily on fingertip guidance because the gouge travels readily. In wood, especially dense or grain-resistant wood, that strategy can overload the wrist. Controlled movement from the shoulder and elbow, combined with a relaxed grip, distributes force more effectively and reduces the temptation to lever the blade through resistance.
Bench hooks, non-slip mats, and correctly positioned blocks are central safety tools rather than optional accessories. The block should be secured so that the holding hand remains behind the cutting path at all times. A useful setup keeps the shoulders level, the elbows close enough to the body for support, and the work at a height that prevents prolonged bending of the neck. Sharp tools are safer than dull ones because they require less force, but sharpness must be paired with a predictable direction of travel and an unobstructed work area.
- Begin with the block centered in front of the torso, not far to one side where the wrist must twist.
- Adjust the bench hook so the block cannot slide when moderate forward pressure is applied.
- When moving from linoleum to wood, reduce the length of each cut and let the tool make several controlled passes.
- Shift the entire block to follow a curve instead of rotating only the wrist.
- Pause regularly to release the grip, roll the shoulders gently, and inspect the cut before adding pressure.
Continuous pressure is especially fatiguing when a design contains large areas of waste removal. Breaking those areas into stages helps preserve precision. A broad U-gouge can establish channels, followed by a chisel or narrower gouge for clearing ridges. On linoleum, rapid cutting can also be hazardous because a sharp tool may travel farther than expected. On wood, the opposite danger often appears: the tool stops suddenly, and the hand or shoulder continues forward. Both surfaces reward anticipation, stable support, and a willingness to slow down.
Choosing Your Block to Match Your Creative Mark
The most productive choice begins with visual intent. Linoleum is well suited to solid flats, clear silhouettes, sweeping organic contours, and designs in which a quiet surface lets the image carry the emphasis. Its grain-free character can be valuable for collaborative workshops, classroom demonstrations, and editions where consistent results matter. Wood brings another vocabulary: directional marks, broken edges, subtle shifts in pressure, and the possibility that the block”s own history will remain visible in the print.
Neither material should be treated as a test of artistic rank. A thoughtful printmaker chooses according to the relationship between image, hand, tool, and time. In a community studio, a useful exercise is to transfer the same small design to a piece of battleship linoleum, a soft side-grain wood, and, where appropriate, a denser block. Compare the cuts, the physical effort, the test impressions, and the marks that appear unintentionally. Such comparison turns material resistance into a source of knowledge and gives artists a practical way to refine their individual visual language.
- Choose linoleum when uninterrupted curves, uniform flats, and predictable hand printing are central to the image.
- Choose side-grain wood when grain, texture, and controlled irregularity contribute to the design.
- Explore end grain when exceptionally fine detail justifies specialized tools and slower carving.
- Match bevel, handle, and gouge profile to both substrate hardness and hand comfort.
- Use shared studio sessions to compare test blocks, discuss safe cutting habits, and learn from regional printmaking peers.
